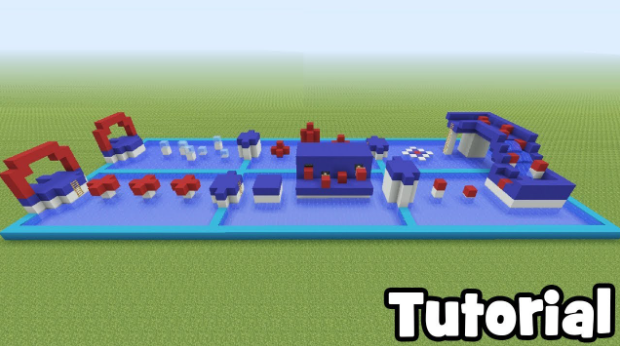
Are you an avid Minecraft player looking for a new challenge? Do you enjoy testing your skills and creativity? Then building a Minecraft parkour course may be just the project for you!
In this guide, we will walk you through the steps to creating your own parkour course, from designing the layout to adding obstacles and challenges. You’ll be able to test your own skills and challenge your friends to beat your time. So grab your pickaxe and let’s get started on this exciting new adventure!
How to Build a Minecraft Parkour Course and Test Your Skills
Choose a location and clear the area of any obstacles.
Design the course using various blocks and obstacles such as ladders, trap doors, and pressure plates.
Add checkpoints throughout the course to allow players to restart from a certain point.
Create a starting and ending point, and add a timer to track completion times.
Test the course yourself and make any necessary adjustments.
Invite friends to test the course and compete for the fastest completion time.
Building and Testing Your Skills on a Minecraft Parkour Course
1. Choosing the Right Location
Minecraft parkour courses can be built anywhere, but it’s important to choose a location that offers enough space and variety to make the course challenging and interesting. Look for areas with hills, valleys, and plenty of open space. A flat area with no obstacles won’t offer the same level of challenge as a course with varied terrain.
Once you’ve found a suitable location, it’s time to start planning your course. Consider the length of the course, the types of obstacles you want to include, and the level of difficulty you want to achieve. You can find plenty of inspiration online, but don’t be afraid to get creative and come up with your own unique ideas.
2. Gathering Materials
Before you can start building, you’ll need to gather the materials you’ll need to construct your parkour course. You’ll need plenty of blocks, such as wood, stone, and dirt, as well as ladders, trapdoors, and other items that will help you create obstacles and challenges.
You can gather materials by mining or by trading with villagers. If you’re playing on a server, you may be able to purchase materials from other players or from the server’s marketplace. Be sure to gather plenty of materials, as you’ll need a lot to build a full parkour course.
3. Building the Course
Once you have your materials, it’s time to start building your parkour course. Start by laying out the basic structure of the course, using dirt or other easily removable blocks. This will allow you to see how the course will flow and make changes as needed.
Next, start adding obstacles and challenges to the course. Use ladders, trapdoors, and other items to create jumps, gaps, and other obstacles that players will need to navigate. Be sure to test each obstacle as you build it, to ensure that it’s challenging but not impossible.
4. Adding Decorative Elements
While the obstacles are the main focus of your parkour course, adding decorative elements can help make the course more visually appealing and interesting. You can use plants, signs, and other items to add character and personality to your course.
If you’re building on a server, you may also want to consider adding a leaderboard or other scoring system to encourage players to compete for the best time.
5. Testing the Course
Once you’ve finished building your course, it’s time to test it out. Try running through the course yourself, to make sure that it’s challenging but not impossible. You may need to make adjustments to some of the obstacles to make them more or less difficult.
Once you’re happy with the course, invite some friends to test it out. Get feedback from them and make adjustments as needed. You may find that you need to make some changes to the course to make it more fun and challenging.
6. Benefits of Building a Minecraft Parkour Course
Building a Minecraft parkour course can be a fun and rewarding experience. It allows you to flex your creative muscles and come up with unique challenges that will test your skills and those of your friends.
In addition to the creative benefits, building a parkour course can also help improve your problem-solving and critical thinking skills. You’ll need to think carefully about the placement of each obstacle and how it will affect the flow of the course.
7. Vs Other Minecraft Activities
Minecraft offers a wide range of activities, from survival and exploration to building and crafting. While parkour courses are just one of many options, they offer a unique challenge that can be both fun and rewarding.
Compared to other Minecraft activities, parkour courses require a different set of skills, such as timing, precision, and spatial awareness. They can also be completed quickly, making them a great option for players who only have a short amount of time to play.
8. Tips for Success
Building and completing a Minecraft parkour course requires practice and patience. Here are a few tips to help you succeed:
– Start with a simple course and work your way up to more complex challenges.
– Take your time and don’t rush through the obstacles.
– Watch tutorial videos or get advice from experienced players to help you improve your skills.
– Practice regularly to build your skills and improve your times.
9. Conclusion
Building and testing a Minecraft parkour course is a fun and rewarding experience. It allows you to flex your creative muscles and challenge yourself and your friends to improve your skills and times.
With the right materials and a little bit of planning, you can create a challenging and fun parkour course that will keep you and your friends entertained for hours.
10. Additional Resources
– Minecraft Parkour Map: https://www.planetminecraft.com/projects/tags/parkour/
– Tutorial Video: https://www.youtube.com/watch?v=6-9X6vQK6nQ
– Minecraft Parkour Server: https://www.hypixel.net/games/parkour/
Frequently Asked Questions
In this section, we will answer some of the frequently asked questions about building a Minecraft parkour course and testing your skills.
1. How do I start building a Minecraft parkour course?
First, you need to choose a location for your parkour course. Look for a flat area and start building the course using blocks. You can use any type of block, but some blocks have better traction than others. You can use ladders, fences, and pressure plates to create obstacles. You can also add water, lava, and fire to make the course more challenging.
Once you have built the course, you need to test it yourself to make sure it is possible to complete. You can also ask your friends to test the course and give you feedback on how to improve it.
2. How long should a Minecraft parkour course be?
The length of the parkour course depends on your preferences. You can make it as short or as long as you want. However, most players prefer a course that takes around 5-10 minutes to complete. Make sure the course is not too difficult, or it will frustrate the players.
You can also add checkpoints to the course to make it easier for players to continue from where they left off. Make sure the checkpoints are not too close to each other, or it will make the course too easy.
3. How do I test my skills in a Minecraft parkour course?
The best way to test your skills in a Minecraft parkour course is to time yourself and try to beat your previous record. You can also compete with your friends and see who can complete the course the fastest. You can also create leaderboards and keep track of the fastest completion times.
Another way to test your skills is to join a Minecraft server that has parkour courses and compete with other players. This will give you an opportunity to see how you stack up against other players.
4. How can I make a Minecraft parkour course more challenging?
You can make a Minecraft parkour course more challenging by adding more obstacles and increasing the difficulty level. You can also make the course longer and add more checkpoints. You can use command blocks to create special effects, such as teleporting the player to a different location, adding effects like blindness or slowness, or spawning mobs that the player has to avoid.
You can also create different levels of difficulty for your parkour course. Beginners can start with an easy course, and as they improve their skills, they can move on to more difficult courses.
5. How do I share my Minecraft parkour course with others?
The best way to share your Minecraft parkour course with others is to upload it to a Minecraft server or a website that hosts Minecraft maps. You can also share your course with your friends by sending them the map file. Make sure to include instructions on how to install the map and how to play the course.
You can also create a video of yourself playing the course and upload it to YouTube or other video sharing platforms. This will give others an idea of what the course looks like and how to play it.
How To Make The Most ULTIMATE Parkour Course In Minecraft!!!
In conclusion, building a Minecraft parkour course can be a fun and challenging experience. Not only does it allow you to test your own skills, but you can also share your creation with others and challenge them to beat your time.
Remember to start with a plan and gather the necessary materials before beginning construction. Take your time and make sure each obstacle is well-designed and fits with the overall theme of your course.
Once your parkour course is complete, gather some friends and put your skills to the test. Who will come out on top and be crowned the parkour champion? Give it a try and find out!


![Remember When Minecraft Was Just… Minecraft? We Do. [=G!X=] Minecraft Server](https://serverbrowse.com/wp-content/uploads/2025/06/file_00000000862461f5b163a329f40f537f-1-500x300.png)
